Friday, October 19, 2012

Lesson 7


Lesson 7:  SWAG BORDER

Have you seen those fancy swag borders they started using in the romantic art era clear up to now?  They look too complicated to try, right?  Well . . . I hope this system will help untangle the mystery for you. Now you can create beautiful swag borders like the one above for your scrapbook,  personal history, or any document.

Here’s how:
 
1.         You draw  a large “C,” an “F,”a foreward/backward “S,” or any simple vine.
2.       Then, you add a few shorter stems onto the basic vine.
3.        After that, you encase all the lines in a wide border.
4.       Finally, you add lines or veins to the leaves—for that’s just what they are—glorified leaves.
5.       Now, you are ready to put your swags together into a fancy border and voila!

Assignment:  Create a lovely swag border of your own.

As you get proficient at this technique, you may add flowers, celtic knots, shields, or anything else you like. You can darken or paint the leaves, stylize them to your own taste, or add scallops and whimsies to your borders.

There are four patterns in the chart below. (S1-31, S2-31, and S3-31) the swag curls, and (M1-14) the mistletoe.

Notice the chart below.  

             Follow the steps for each piece of border starting from left to right.

 There can be many variations and deviations. Below are a few to consider.


           Add the thick and thin line technique to help finish your border.


          The border below is enhanced by gold paint (It looks dark tan in this picture)


This is an example of the same border at the top of the post, but painted in acrylics.

            Now, enjoy and surprise yourself!
Wednesday, September 26, 2012

LESSON 6


Lesson 6:  Pumpkin Decorating Fest


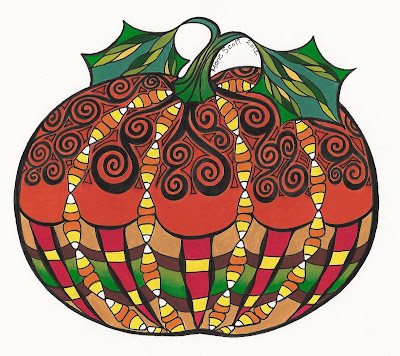
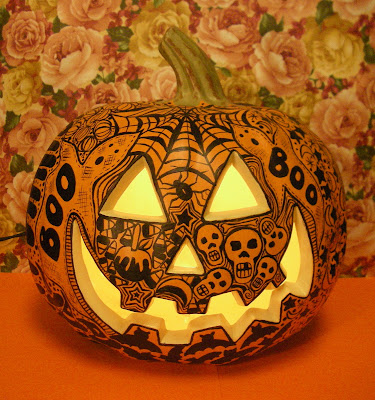
Pumpkin:  drawn, painted with acrylics, and detailed in black ink

"Spooky Jack"   Paint a profusion of Halloween art on a Jack-o-lantern

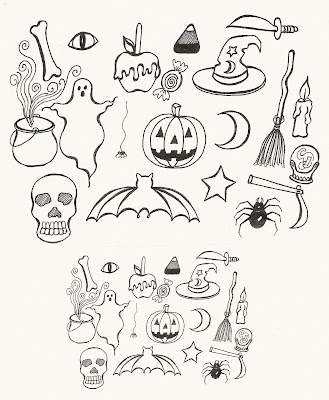
This lesson is pure Halloween fun.  You get a pumpkin to decorate, four Halloweenish patterns, and a page of big and little Halloween shapes to draw and use (or trace and use, as necessary).  You can use the basic patterns, the quilt patterns, and any of the other patterns we’ve had to decorate your pumpkin in any way you like. You can even make up your own patterns. Have fun being creative!

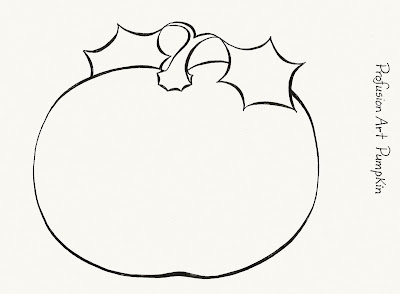
Assignment: Copy, paste, and print the pumpkin, then decorate it as explained above.

You are welcomed to send me a copy of your pumpkin to post on the profusionart blog!

Found below, are the pumpkin, the Halloween shapes, and the instructions for four new Halloween squares.  Following those are three more examples of decorated pumpkins.

Copy and paste, enlarge, and print this pumpkin; then decorate
Use these shapes as desired; print, trace, or manipulate on your computer
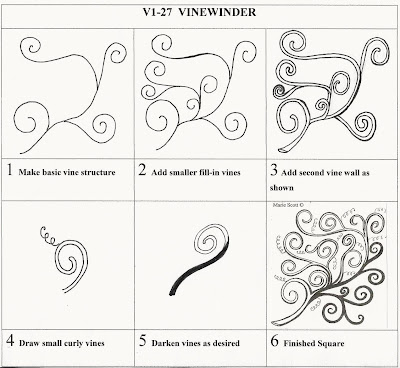
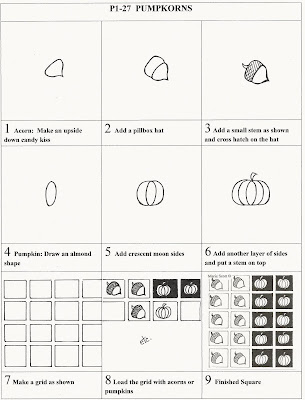
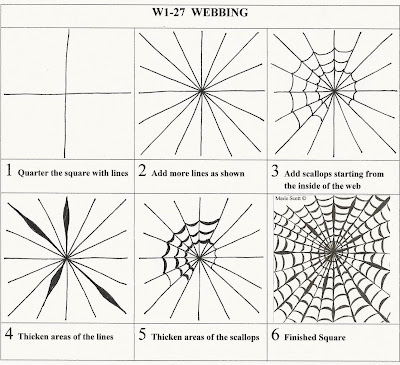
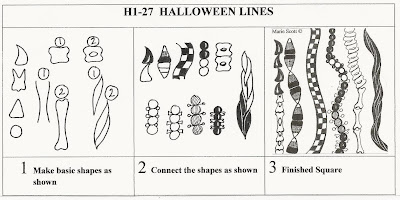
Below are the four new design squares. Draw the squares to use for future artwork.


Use these lines of art to carry and move the eye around in your picture

This versatile vine pattern can be used to fill large areas or pull sections together

This type of pattern can use any small shape. Or, make the shapes without borders

This is a great filler, or it can be used as a divider of compartments to fill with good things


The following are my example designs. 


Use your imagination and ENJOY!

Thursday, August 30, 2012

LESSON 5


Lesson  5:  Card Making

      Study the picture sets below. Notice the same steps were taken in each set of pictures.
     Though I've used pictures that look like real things in this lesson, you don't have to make anything look real in expressive art. You can make everything abstract--and as long as it's done neatly--it will be great. Remember not to be in a hurry. Your goal is to enjoy your Profusion Art time.


     You can do Profusion Art on any kind of card, but these cards have been simplified to         make the most of adding color. In this case it’s water color.
1.        First, make a simple line drawing
2.      Next, watercolor the line drawing
3.      Then, draw details in black pen, just as you have learned to do in Profusion Art

ASSIGNMENT:  Using the next twelve patterns, mix and match to make a never-ending supply of cards. You’ll have fun making the cards, and they’ll show an extra measure of love for those who receive them, so everyone is enriched.


( If you don’t know, or have forgotten what the TnT line technique is, go back to Lesson 1. )


In this lesson, I’d also like you to consider how you could dress up names or words to put on a card or another project.  Notice the word art illustration below—and have fun with your patterns, or make up new ones!

Word Art

Monday, August 13, 2012

LESSON 4


Lesson  4:  Project Clean

If you found the last lesson too elementary, this lesson takes a step in a new direction. You will be adding pictures of real objects. They are stylized or simplified, but it is easy to tell what they are. The rest of the squares are abstract and can be used as eye-carriers or filler. 
To see an example of how I’ve used these patterns in “Clean,” go back to the Tuesday, July 31st posting.

Tip:  Use a variety of light, medium, and dark values to create a more interesting design.

Below are six squares with seven patterns.


Pattern instructions follow for each square: (Sponges and Water Globs are shown as separate squares)


Assignment:  Use these seven patterns, plus any other patterns you wish, to create a new work of art.


"Clean" by Marie Scott  (This picture was made using the seven previous patterns, plus some basic patterns.)


Saturday, August 4, 2012

LESSON 3


Lesson  3:  Crazy Quilt

This illustrates how you can "draw" your own quilt using nearly any pattern

          This is an exciting lesson because you will do your first project using "Profusion Art" patterns—plus anything else you want to add to it. Again, be neat and take your time because, as promised, there are 12 quilt patterns to draw onto 4”X4” cards, as well as your crazy quilt to design and draw. This is a simple lesson, though it will consume time. (Time—like the 15 minutes here and there that may otherwise be wasted.)  Don’t forget how portable this art is.

Tip:   You can work on one square at a time while doing the following:
1.       Waiting at the dentist or doctor’s office
2.       Waiting for a child at an appointment
3.       While watching TV
4.       While resting
5.       Any time you have a wait of any kind on your hands

       
Here are the 12 quilt block patterns below arranged in two triangles per square.  You may also do it that way if you wish.


Here are the instructions for those patterns below.


       Assignment:  After you have drawn your 12 patterns on 4”X4” cards, make a plan for your crazy quilt, choose the patterns you’ll use in it, and draw it up! Have the time of your life.   (For an example of how to do this project, refer to the July (7) previous post  [not the sidebar]  called "How is it done?"   It gives you a picture diagram on how to create the plan and make the quilt.) 


LESSON 2


Lesson  2:  Basic Patterns
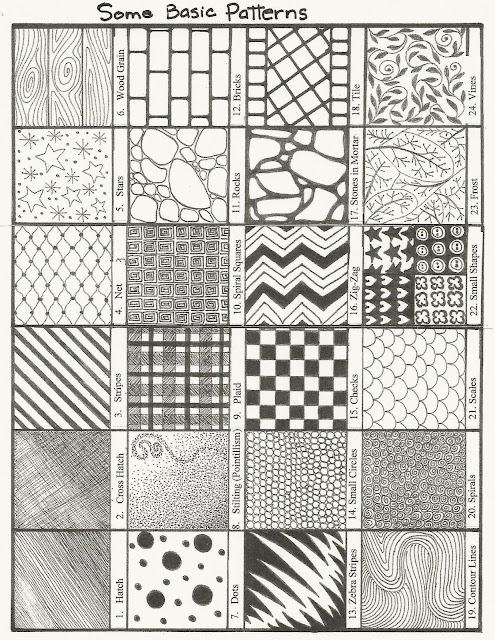
As promised, I have 24 basic patterns in this lesson, some of which you may use repeatedly, as I do. Some are art techniques, such as hatching and cross hatching, and others are patterns. You may have ideas for many other basic patterns. If so, draw them onto your cards for later reference.


(Instructions for these patterns follow below)


Assignment:  Draw each pattern onto a 4”X4” card to keep in your portfolio for future use. You may have ideas for many other basic patterns. If so, draw them onto your cards for later reference. Be neat and take as much time as you need for this lesson, as you are laying the groundwork for great projects ahead.